We are starting with a tutorial series which will be multi-part consisting creation of a simple Node.js API with MongoDB integration and later will be connecting the API to Android App.
i) We will be creating Node.js API and running it locally on localhost.
Node.js is basically written in javascript and will be needing a text editor.
Will be using Sublime Text 2 which as powerful editing options with more plugins gives good control to code.
You should have basic understanding of Node.js and its specific modules like Express.
Download latest version of Node.js installable archive file from Node.js Downloads.
We will be using Express framework module which gives functionality for HTTP Requests.
In terminal , enter npm install express --save that will download express installation locally and creates a directory express inside node_modules.
Create a folder NodeExample and inside create file main.js .
var app = express();
var jsonMessage = '{"status":"true","message":"hello node.js"}';
// this callback will respond with the message string
// "hello" is the API method to be called
app.get('/hello', function (req, res) {
res.writeHead(200, {'Content-Type': 'text/plain'});
// Send the response body as hardcoded json containing message
res.end(jsonMessage);
})
var server = app.listen(8080, function () {
var port = server.address().port
console.log("Node app listening at http://127.0.0.1:%s", port)
})
Now, run the above file using terminal.
Navigate to NodeExample folder and then enter node main.js to run the application at localhost/8080 or 127.0.0.1/8080.
Console output :
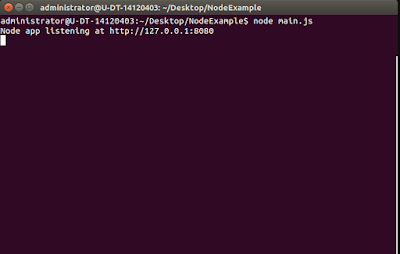
ii) We’ll create a simple android app with Retrofit which have powerful framework for authenticating and interacting with APIs and sending network requests with OkHttp.
1. In Android Studio, go to File ⇒ New Project and fill all the details required to create a new project.
2. Open build.gradle and add retrofit library dependency.
compile 'com.squareup.retrofit:retrofit:1.9.0'
compile 'com.squareup.okhttp:okhttp:2.0.0'
3.Open layout file (activity_main.xml) and add the below layout.
<?xml version="1.0" encoding="utf-8"?>
<RelativeLayout xmlns:android="http://schemas.android.com/apk/res/android"
xmlns:tools="http://schemas.android.com/tools"
android:layout_width="match_parent"
android:layout_height="match_parent"
tools:context="devs.yoland.nodedroid.MainActivity">
<TextView
android:id="@+id/tv_msg"
android:layout_width="wrap_content"
android:layout_height="wrap_content"
android:layout_centerHorizontal="true"
android:layout_centerVertical="true"
android:textColor="@android:color/black"
android:textSize="18sp" />
</RelativeLayout>
Will be getting the text from the API and display it inside the TextView.
4.Now we will setup Helper classes for calling API in Retrofit.
public class WebService extends AsyncTask<String, Void, String> {
Activity activity;
WebserviceResponseListner listener = null;
String METHOD_NAME = "";
public WebService(Activity activity, WebserviceResponseListner listner, String methodName) {
this.activity = activity;
this.METHOD_NAME = methodName;
this.listener = listner;
}
@Override
protected String doInBackground(String... strings) {
switch (METHOD_NAME) {
case "hello":
HelloNode();
break;
}
return null;
}
}
Here , HelloNode() is the method for capturing the response results for the API calls that we will be adding in a while.
WebserviceResponseListner is a interface used to process the response received from the API.
public interface WebserviceResponseListner {
public void OnResponse(Object response, boolean flagToCheckFailure, String webServiceName);
}
Also create one more interface ApiMethods for defining the request for the API. Here ,"hello" is the API method to be called using GET method.
public interface ApiMethods {
@GET("/hello")
void HelloNode(RestCallback<MainActivity.HelloNodeResponse> restCallback);
}
Here , RestCallback is a abstract class extending Retrofit Callback which provides the methods success() and failure().
public abstract class RestCallback<T> implements Callback<T> {
}
Lastly , create a class RestClient for initializing the URL to hit in our case "http://10.0.2.2:8080" when running on the emulator or the ip address of the network the mobile device and the PC system are connected.
public class RestClient {
private static ApiMethods REST_CLIENT;
private static String ROOT = "http://10.0.2.2:8080";
static {
setupRestClient();
}
private RestClient() {
}
public static ApiMethods get() {
return REST_CLIENT;
}
private static void setupRestClient() {
OkHttpClient okHttpClient = new OkHttpClient();
okHttpClient.setReadTimeout(20 * 1000, TimeUnit.MILLISECONDS);
RestAdapter restAdapter = new RestAdapter.Builder()
.setEndpoint(ROOT).setClient(new OkClient(okHttpClient)).setLogLevel(RestAdapter.LogLevel.FULL)
.build();
REST_CLIENT = restAdapter.create(ApiMethods.class);
}
}
Now , modify WebService class adding HelloNode() for capturing the response result.
private void HelloNode() {
RestClient.get().HelloNode(new RestCallback<MainActivity.HelloNodeResponse>() {
@Override
public void success(MainActivity.HelloNodeResponse updateProfileResponsePojo, Response response) {
Log.e("Successful", response.toString() + "/" + response.getUrl());
listener.OnResponse(updateProfileResponsePojo, false, "hello");
}
@Override
public void failure(RetrofitError error) {
Log.e("Url", error.toString() + "/" + error.getUrl());
listener.OnResponse(new Object(), true, "hello");
}
});
}
If you are still around ,all the helper classes for the API calls are done.
5.Now ,we will be modifying the MainActivity.java file for handling the response from the API as per the hardcoded json message.
public class MainActivity extends AppCompatActivity {
TextView tv_msg;
@Override
protected void onCreate(Bundle savedInstanceState) {
super.onCreate(savedInstanceState);
setContentView(R.layout.activity_main);
tv_msg = (TextView) findViewById(R.id.tv_msg);
}
public class HelloNodeResponse {
String status, message;
public HelloNodeResponse(String status, String message) {
this.status = status;
this.message = message;
}
public String getStatus() {
return status;
}
public void setStatus(String status) {
this.status = status;
}
public String getMessage() {
return message;
}
public void setMessage(String message) {
this.message = message;
}
}
}
HelloNodeResponse class will process the json response using the getter and setters. Now in onCreate() will have to call the API.
Add to onCreate() as follows :
new WebService(MainActivity.this, (WebserviceResponseListner) MainActivity.this,
"hello").execute();
Now we have to implement WebserviceResponseListner that will give us OnResponse() overriden method to process the Response.
The entire MainActivity.java looks us follows :
public class MainActivity extends AppCompatActivity implements WebserviceResponseListner {
TextView tv_msg;
@Override
protected void onCreate(Bundle savedInstanceState) {
super.onCreate(savedInstanceState);
setContentView(R.layout.activity_main);
tv_msg = (TextView) findViewById(R.id.tv_msg);
new WebService(MainActivity.this, (WebserviceResponseListner) MainActivity.this,
"hello").execute();
}
public class HelloNodeResponse {
String status, message;
public HelloNodeResponse(String status, String message) {
this.status = status;
this.message = message;
}
public String getStatus() {
return status;
}
public void setStatus(String status) {
this.status = status;
}
public String getMessage() {
return message;
}
public void setMessage(String message) {
this.message = message;
}
}
@Override
public void OnResponse(Object response, boolean flagToCheckFailure, String webServiceName) {
if (webServiceName.equalsIgnoreCase("hello")) {
if (!flagToCheckFailure) {
HelloNodeResponse data = (HelloNodeResponse) response;
tv_msg.setText(data.getMessage());
} else {
Toast.makeText(this, "Something went Wrong", Toast.LENGTH_LONG).show();
}
}
}
}
Now run the Application on an emulator while the main.js node application is still running on localhost (that we have left running above).
You will get the following message output in the app :

If you are stuck anywhere while implementing above example be patient and try to debug or kindly comment your queries here.
i) We will be creating Node.js API and running it locally on localhost.
Node.js is basically written in javascript and will be needing a text editor.
Will be using Sublime Text 2 which as powerful editing options with more plugins gives good control to code.
You should have basic understanding of Node.js and its specific modules like Express.
Download latest version of Node.js installable archive file from Node.js Downloads.
We will be using Express framework module which gives functionality for HTTP Requests.
In terminal , enter npm install express --save that will download express installation locally and creates a directory express inside node_modules.
Create a folder NodeExample and inside create file main.js .
main.js
var express = require('express'); // import the express framework
var app = express();
var jsonMessage = '{"status":"true","message":"hello node.js"}';
// this callback will respond with the message string
// "hello" is the API method to be called
app.get('/hello', function (req, res) {
res.writeHead(200, {'Content-Type': 'text/plain'});
// Send the response body as hardcoded json containing message
res.end(jsonMessage);
})
var server = app.listen(8080, function () {
var port = server.address().port
console.log("Node app listening at http://127.0.0.1:%s", port)
})
Now, run the above file using terminal.
Navigate to NodeExample folder and then enter node main.js to run the application at localhost/8080 or 127.0.0.1/8080.
Console output :

ii) We’ll create a simple android app with Retrofit which have powerful framework for authenticating and interacting with APIs and sending network requests with OkHttp.
1. In Android Studio, go to File ⇒ New Project and fill all the details required to create a new project.
2. Open build.gradle and add retrofit library dependency.
compile 'com.squareup.retrofit:retrofit:1.9.0'
compile 'com.squareup.okhttp:okhttp:2.0.0'
3.Open layout file (activity_main.xml) and add the below layout.
<?xml version="1.0" encoding="utf-8"?>
<RelativeLayout xmlns:android="http://schemas.android.com/apk/res/android"
xmlns:tools="http://schemas.android.com/tools"
android:layout_width="match_parent"
android:layout_height="match_parent"
tools:context="devs.yoland.nodedroid.MainActivity">
<TextView
android:id="@+id/tv_msg"
android:layout_width="wrap_content"
android:layout_height="wrap_content"
android:layout_centerHorizontal="true"
android:layout_centerVertical="true"
android:textColor="@android:color/black"
android:textSize="18sp" />
</RelativeLayout>
Will be getting the text from the API and display it inside the TextView.
4.Now we will setup Helper classes for calling API in Retrofit.
AsyncTask
Create class WebService extends a AsyncTask for calling API in background.
public class WebService extends AsyncTask<String, Void, String> {
Activity activity;
WebserviceResponseListner listener = null;
String METHOD_NAME = "";
public WebService(Activity activity, WebserviceResponseListner listner, String methodName) {
this.activity = activity;
this.METHOD_NAME = methodName;
this.listener = listner;
}
@Override
protected String doInBackground(String... strings) {
switch (METHOD_NAME) {
case "hello":
HelloNode();
break;
}
return null;
}
}
Here , HelloNode() is the method for capturing the response results for the API calls that we will be adding in a while.
Response
WebserviceResponseListner is a interface used to process the response received from the API.
public interface WebserviceResponseListner {
public void OnResponse(Object response, boolean flagToCheckFailure, String webServiceName);
}
Request
Also create one more interface ApiMethods for defining the request for the API. Here ,"hello" is the API method to be called using GET method.
public interface ApiMethods {
@GET("/hello")
void HelloNode(RestCallback<MainActivity.HelloNodeResponse> restCallback);
}
Callback
Here , RestCallback is a abstract class extending Retrofit Callback which provides the methods success() and failure().
public abstract class RestCallback<T> implements Callback<T> {
}
Lastly , create a class RestClient for initializing the URL to hit in our case "http://10.0.2.2:8080" when running on the emulator or the ip address of the network the mobile device and the PC system are connected.
public class RestClient {
private static ApiMethods REST_CLIENT;
private static String ROOT = "http://10.0.2.2:8080";
static {
setupRestClient();
}
private RestClient() {
}
public static ApiMethods get() {
return REST_CLIENT;
}
private static void setupRestClient() {
OkHttpClient okHttpClient = new OkHttpClient();
okHttpClient.setReadTimeout(20 * 1000, TimeUnit.MILLISECONDS);
RestAdapter restAdapter = new RestAdapter.Builder()
.setEndpoint(ROOT).setClient(new OkClient(okHttpClient)).setLogLevel(RestAdapter.LogLevel.FULL)
.build();
REST_CLIENT = restAdapter.create(ApiMethods.class);
}
}
Now , modify WebService class adding HelloNode() for capturing the response result.
private void HelloNode() {
RestClient.get().HelloNode(new RestCallback<MainActivity.HelloNodeResponse>() {
@Override
public void success(MainActivity.HelloNodeResponse updateProfileResponsePojo, Response response) {
Log.e("Successful", response.toString() + "/" + response.getUrl());
listener.OnResponse(updateProfileResponsePojo, false, "hello");
}
@Override
public void failure(RetrofitError error) {
Log.e("Url", error.toString() + "/" + error.getUrl());
listener.OnResponse(new Object(), true, "hello");
}
});
}
If you are still around ,all the helper classes for the API calls are done.
5.Now ,we will be modifying the MainActivity.java file for handling the response from the API as per the hardcoded json message.
public class MainActivity extends AppCompatActivity {
TextView tv_msg;
@Override
protected void onCreate(Bundle savedInstanceState) {
super.onCreate(savedInstanceState);
setContentView(R.layout.activity_main);
tv_msg = (TextView) findViewById(R.id.tv_msg);
}
public class HelloNodeResponse {
String status, message;
public HelloNodeResponse(String status, String message) {
this.status = status;
this.message = message;
}
public String getStatus() {
return status;
}
public void setStatus(String status) {
this.status = status;
}
public String getMessage() {
return message;
}
public void setMessage(String message) {
this.message = message;
}
}
}
HelloNodeResponse class will process the json response using the getter and setters. Now in onCreate() will have to call the API.
Add to onCreate() as follows :
new WebService(MainActivity.this, (WebserviceResponseListner) MainActivity.this,
"hello").execute();
Now we have to implement WebserviceResponseListner that will give us OnResponse() overriden method to process the Response.
The entire MainActivity.java looks us follows :
public class MainActivity extends AppCompatActivity implements WebserviceResponseListner {
TextView tv_msg;
@Override
protected void onCreate(Bundle savedInstanceState) {
super.onCreate(savedInstanceState);
setContentView(R.layout.activity_main);
tv_msg = (TextView) findViewById(R.id.tv_msg);
new WebService(MainActivity.this, (WebserviceResponseListner) MainActivity.this,
"hello").execute();
}
public class HelloNodeResponse {
String status, message;
public HelloNodeResponse(String status, String message) {
this.status = status;
this.message = message;
}
public String getStatus() {
return status;
}
public void setStatus(String status) {
this.status = status;
}
public String getMessage() {
return message;
}
public void setMessage(String message) {
this.message = message;
}
}
@Override
public void OnResponse(Object response, boolean flagToCheckFailure, String webServiceName) {
if (webServiceName.equalsIgnoreCase("hello")) {
if (!flagToCheckFailure) {
HelloNodeResponse data = (HelloNodeResponse) response;
tv_msg.setText(data.getMessage());
} else {
Toast.makeText(this, "Something went Wrong", Toast.LENGTH_LONG).show();
}
}
}
}
Now run the Application on an emulator while the main.js node application is still running on localhost (that we have left running above).
You will get the following message output in the app :

If you are stuck anywhere while implementing above example be patient and try to debug or kindly comment your queries here.
it giving me an error on
ReplyDelete@Override
public void failure(RetrofitError error) {
listener.OnResponse(new Object(), true, "hello");
}
it says cannot resolve symbol RetrofitError
This is a great tutorial. My only problem is this error
ReplyDeleteError:Execution failed for task ':app:transformDexArchiveWithExternalLibsDexMergerForDebug'
I'm not sure if it's because I'm using updated jar files for Retrofit and okhttp or if it's something else. Any help would be appreciated!
This tutorial provides a practical introduction to creating a Node.js API with Express and preparing it for integration with an Android application. It covers setting up a local Node.js project, installing Express, creating an API endpoint, and running the service on localhost. The use of Express for handling HTTP requests provides a useful foundation for developers learning backend API development through a Node JS Course.
DeleteThe planned MongoDB integration makes the tutorial useful for understanding how a Node.js API can work with a NoSQL database. The combination of Node.js, Express, and MongoDB represents a common approach for building data-driven web APIs, which can be explored further through a MongoDB Course.
DeleteThe Android section demonstrates how a mobile application can consume the Node.js API using Retrofit and OkHttp, including configuring the Android Studio project and adding the required dependencies. This API-based approach can also be relevant when developing Android Projects for Final Year.
DeleteThis comment has been removed by a blog administrator.
ReplyDeleteBest Ways to Become A Professional Betting Agent (Baccarat & More)
ReplyDeleteWe have all the resources and expertise you need งานออนไลน์ to make the best online betting experience possible. Online Sportsbook - Best 1xbet korean Betting 바카라 Sites
Best Casino Site Review 2021 - Lucky Club Live
ReplyDeleteFind out about the best Casino Site reviews for 2021. It's not an luckyclub.live easy one, the casino offers slots, video poker, roulette, video poker and sports
Thanks for raising awareness about this critical security issue and highlighting the potential risks involved. Integrating JS to android app is possible through frameworks. This allows developers to leverage JS libraries and functionalities while building cross-platform mobile applications with native capabilities and performance.
ReplyDeleteThank you for sharing this valuable content. I learned something new today.workday hcm course
ReplyDeleteMicroStrategy developer training prepares professionals to design and develop enterprise BI applications with confidence. This microstrategy developer training covers schema objects, report development, dashboards, metrics, and data visualization. Students gain hands-on experience through industry-focused projects.
ReplyDeleteAs someone who enjoys trying different Android games, I think Mod APKs can make mobile gaming more exciting by offering additional features and fresh ways to experience familiar titles. I always prefer using a trusted source with organized information and regular updates. One website that has been helpful for me is https://apksunday.com/
ReplyDelete, where I can quickly discover new games, read detailed descriptions, and keep up with the latest releases. The site is easy to navigate and has a wide selection of apps and games. Overall, it’s a useful destination for anyone interested in exploring the world of Mod APKs.
Very useful information for aspiring MuleSoft developers. Well-structured MuleSoft classes can provide hands-on experience with real-world integration projects.mulesoft classes
ReplyDeleteI found the information in this post genuinely useful. The explanation of Xuper APK gives readers a better understanding of what the application offers and how its interface is structured. I especially liked that the article discusses the experience instead of simply repeating technical specifications. Navigation, search options, and content organization are important factors when deciding whether an app is convenient. The article made me interested in learning more about its compatibility with different devices as well. A detailed comparison with other entertainment apps would make an excellent follow-up and provide readers with even more useful information.
ReplyDeleteYoucine Download is a term used by users searching for information about the Youcine entertainment app. The platform provides an easy way to explore movies and TV series, while its organized categories help users browse different genres and discover new titles conveniently.
ReplyDeleteI came across your article by chance, but I'm glad I stopped to read it. The information was practical and explained in a way that was easy for an ordinary user to understand. I was particularly interested in Xuper Hydra APK, so I decided to explore the app after reading your post. So far, I like the simple interface and smooth navigation. It didn't take long to understand where everything was located. Your article gave me a good starting point and made the experience much easier. Thanks for sharing such helpful content with your readers xuperhydra.net.
ReplyDeleteI found this article really useful because it gives a clear introduction to connecting Android with Node.js and MongoDB through an API. I liked the practical approach, especially for anyone who is learning how mobile apps communicate with a backend database. It also reminded me how many different Android applications rely on similar technologies behind the scenes. While exploring Android apps recently, I came across Xuper Hydra APK and became curious about its entertainment features. I searched for more information about Xuper Hydra Celular and found the topic interesting to explore.
ReplyDelete